Quick Summary: Ready to inject new life into your Adobe projects? Adding custom fonts is a breeze! This guide shows you exactly how to install fonts for Adobe Creative Cloud apps like Photoshop, Illustrator, and InDesign, ensuring your designs stand out with unique typography.
Ever found yourself staring at a project, wishing for that perfect font to make it sing? You’ve got a fantastic idea, but the default options just aren’t cutting it. It’s a common creative block, and the solution is often simpler than you think: adding new fonts to your Adobe applications.
Whether you’re a seasoned pro or just starting out, knowing how to manage and use your font library efficiently can transform your workflow. This guide is designed to demystify the process. We’ll break down exactly how to install fonts so Adobe Creative Cloud apps recognize them, making them ready for your next masterpiece.
Forget frustrating searches and compatibility worries. We’ll walk through each step with clear instructions, focusing on making your design life easier and your output more creative. Let’s dive in and unlock a world of typographic possibilities!
Why Add New Fonts to Adobe?

Think of fonts as the personality of your text. Standard fonts are great, but they can sometimes feel a little… ordinary. Adding new fonts to your Adobe arsenal allows you to:
- Enhance Brand Identity: Unique fonts can make your brand instantly recognizable and memorable.
- Boost Visual Appeal: Different font styles can convey specific moods, from playful and casual to elegant and sophisticated.
- Stand Out from the Crowd: Using less common, carefully chosen fonts can give your projects a professional edge that grabs attention.
- Improve Readability (Sometimes!): While it might seem counterintuitive, specialized fonts can sometimes improve readability in specific contexts, like for body text in a particular style of publication.
- Explore Creative Possibilities: From sleek sans-serifs to elegant scripts and bold display fonts, a vast world of typography awaits.
Ultimately, having a diverse font library means you’re never limited by choice. You have the tools to perfectly match your typography to your message.
Understanding Where Fonts Live: System vs. Application

Before we start adding fonts, it’s helpful to understand how your computer and Adobe applications handle them. Generally, fonts are installed at the operating system level (your computer’s system) or managed through cloud services.
When you install an Adobe Creative Cloud application (like Photoshop, Illustrator, or InDesign), it’s designed to access fonts installed on your operating system or through the Adobe Fonts service. This means you don’t usually need to install a font directly into each Adobe app. Instead, you install it once on your computer, and Adobe apps can then see and use it.
There are a few main ways fonts become available:
- System Fonts: These are fonts that come pre-installed with your operating system (Windows or macOS).
- Manually Installed Fonts: Fonts you download from the web or purchase and then install yourself onto your computer.
- Adobe Fonts: A subscription service included with Creative Cloud that provides access to a massive library of high-quality fonts.
Our focus today is on getting those manually installed fonts and Adobe Fonts seamlessly integrated into your Adobe workflow.
Method 1: Adding Fonts from Adobe Fonts (Creative Cloud)

If you have an Adobe Creative Cloud subscription, you have a treasure trove of fonts at your fingertips with Adobe Fonts. It’s the most integrated and often the easiest way to access a vast, high-quality font library directly within your Adobe applications.
Step-by-Step: Activating Fonts from Adobe Fonts
This process is refreshingly simple and happens outside of your individual Adobe apps, but those apps will instantly recognize the activated fonts.
-
Open the Creative Cloud Desktop App: Find and launch the Creative Cloud desktop application. You can usually find it in your system’s application folder or by searching for it.
-
Navigate to Fonts: In the Creative Cloud app, look for a “Fonts” tab or section. This might be in the left-hand sidebar or across the top menu, depending on your version of the app. Click on it.
-
Browse or Search: You’ll see a curated library of fonts. You can browse by category (Serif, Sans Serif, Script, etc.), browse curated collections, or use the search bar to find a specific font or foundry (like “Google Fonts” or “Monotype”).
-
Select a Font: Click on a font family that catches your eye. This will open a page with details about the font, including its available weights and styles (e.g., Light, Regular, Bold, Italic).
-
Activate Fonts: Look for the “Activate” button or a toggle switch next to the font family or specific weights you want. Click it to activate. A checkmark or a different indicator will usually appear, confirming activation.
-
Syncing: The Creative Cloud app will automatically sync these fonts to your computer. You’ll see a progress indicator. This can take a few moments.
-
Use in Adobe Apps: Once synced, open your Adobe application (Photoshop, Illustrator, InDesign, etc.). The activated fonts should now appear in your font dropdown menus. Sometimes, restarting the Adobe app might be necessary if it was already open during activation.
Pro Tip: Want to learn more about typography? Adobe offers great resources on font pairing and best practices on their Adobe Fonts About page.
Adobe Fonts is amazing because it handles licensing, installation, and deactivation seamlessly. To deactivate a font you’re no longer using, simply go back to the Creative Cloud app, find the font, and click “Deactivate.”
Method 2: Adding Manually Downloaded or Purchased Fonts
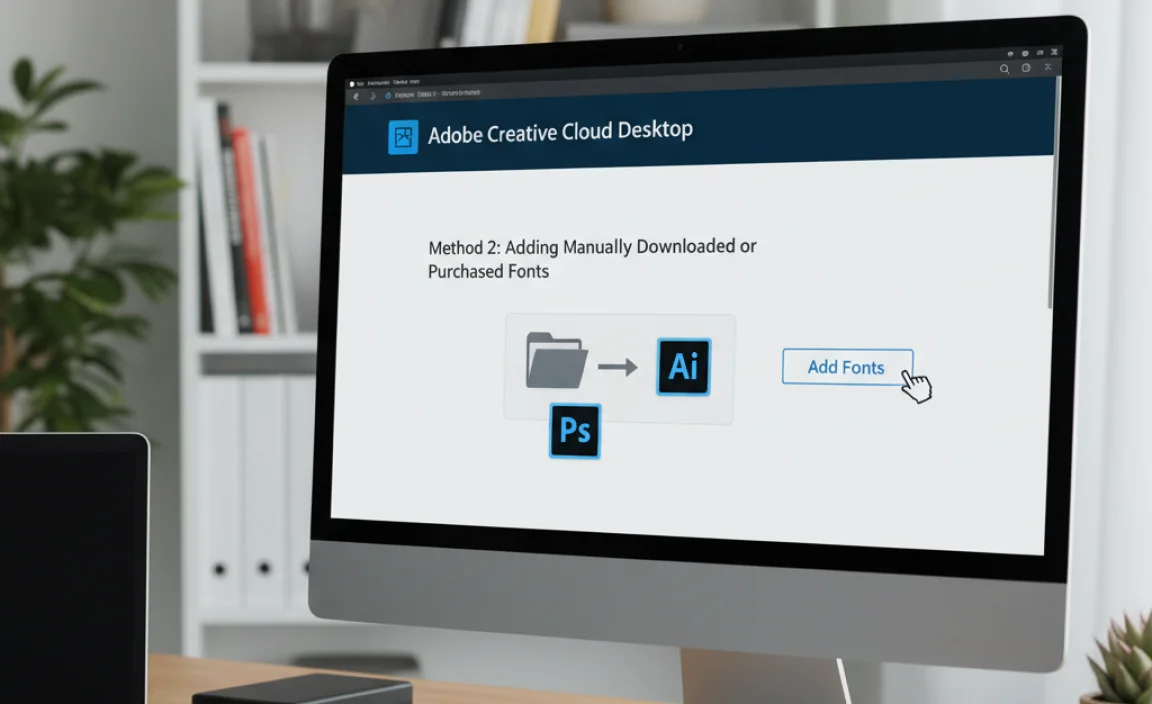
This is for all those amazing fonts you find across the web – from free font sites to professional foundries where you’ve purchased a license. The process here involves installing the font file onto your operating system, which then makes it available to all your applications, including Adobe’s.
Where to Find Fonts
Before you install, you need fonts! Here are some popular places to discover them:
- Free Options:
- Google Fonts: A massive, high-quality collection of open-source fonts.
- DaFont: A popular site with a huge variety, though check licenses carefully for commercial use.
- Adobe Fonts: As mentioned, included with Creative Cloud.
- Paid Options:
- MyFonts: A leading marketplace for professional fonts.
- FontShop: Another excellent resource for premium font families.
- Individual Foundry Websites (e.g., Typography.com for Hoefler&Co., Emtype, etc.)
Font File Types
When you download fonts, you’ll typically encounter these file formats:
- TrueType Fonts (.ttf): Older but widely compatible.
- OpenType Fonts (.otf): More modern, supports more features like ligatures and stylistic alternates, and is generally preferred for professional use. Adobe apps work wonderfully with OTF.
- Web Open Font Format (.woff/.woff2): Primarily for web use, but you can often install them on a system too.
For Adobe applications, .otf and .ttf files are your best bet.
Installing Fonts on Windows
Installing fonts on Windows is straightforward.
-
Locate Your Font Files: After downloading and unzipping (if necessary) your font files (usually .ttf or .otf), place them in an easily accessible folder.
-
Select and Install:
- Single Font: Right-click on the font file (.ttf or .otf) and select “Install” or “Install for all users.” “Install for all users” is recommended if multiple people use the computer or if you want to ensure system-wide availability.
- Multiple Fonts: Select all the font files you want to install by clicking and dragging or holding `Ctrl` (or `Shift`) and clicking. Then, right-click on any of the selected files and choose “Install” or “Install for all users.”
-
Using the Fonts Folder (Alternative): You can also copy the font files directly into the Windows Fonts folder. Navigate to `Control Panel > Appearance and Personalization > Fonts` and drag your font files into this folder. Alternatively, you can type `%windir%fonts` into the Windows search bar and press Enter.
-
Verify Installation: Windows will process the installation. You might see a small font preview window. Once done, the font is installed system-wide.
Installing Fonts on macOS
macOS uses the “Font Book” application to manage fonts.
-
Locate Your Font Files: Find your downloaded .ttf or .otf font files.
-
Open Font Book: You can find Font Book in your Applications folder or by searching via Spotlight (Cmd + Spacebar and type “Font Book”).
-
Install Fonts:
- Drag and Drop: Drag the font file(s) directly into the Font Book window.
- Using the Menu: With Font Book open, go to `File > Add Fonts`. Navigate to your font file(s) and click “Open.”
- Double-Click: You can often simply double-click a font file. This will open a preview in Font Book, and you can click the “Install Font” button.</li
-
Font Validation: Font Book will automatically validate the font for any issues. If there are problems, it will alert you.
-
Use in Adobe Apps: The font is now installed. Open your Adobe application, and the font should appear in the font list.
Using Your Newly Installed Fonts in Adobe Apps
Once a font is installed on your system (either automatically via Adobe Fonts or manually), your Adobe applications should detect it. Here’s how to find and use it:
-
Restart Adobe Applications: If your Adobe app was open while you installed the font system-wide or activated it via Adobe Fonts, it’s a good idea to close and reopen the application. This forces it to refresh its font list.
-
Select the Type Tool: In Photoshop, Illustrator, or InDesign, select the Type Tool (usually represented by a ‘T’ icon).
-
Find Your Font: Click in your document to start typing or select existing text. Then, locate the font dropdown menu. This is usually in the top Options bar (Photoshop/Illustrator) or in the Character panel (InDesign/Photoshop/Illustrator).
-
Search or Scroll: Type the name of your new font into the search field, or scroll through the list alphabetically. Your newly installed font should be there!
-
Apply the Font: Select your font from the list, and it will be applied to your text.
Font Management: Keeping Things Tidy
As you start collecting more fonts, managing them becomes crucial. A cluttered font library can slow down your system and make finding fonts a chore. Consider using font management software.
Popular Font Management Tools
These tools go beyond the basic system installation, offering advanced features like font previews, organization, temporary activation/deactivation, and conflict resolution.
| Tool Name | Platform | Key Features | Best For |
|---|---|---|---|
| Suitcase Fusion (by Extensis) | Windows, macOS | Font organization, auto-activation (activates fonts based on the document you open), previews, conflict resolution. | Professional designers, studios, large font libraries. |
| FontBase | Windows, macOS, Linux | Free version available, quick previews, libraries, plug-ins for design apps. | Beginners to intermediate users, those looking for a feature-rich free option. |
| RightFont | macOS | Cloud sync, live previews, easy organization, integration with Adobe CC. | Mac users, those who need cloud synchronization. |
| Universal Type Server (by Monotype) | Windows, macOS | Server-based, robust asset management, controlled access, audit trails. | Large organizations, design agencies, enterprises managing fonts collaboratively. |
Using a font manager can significantly streamline your workflow when dealing with hundreds or thousands of fonts. For many users sticking to Adobe Fonts and a modest collection of manually installed fonts, the built-in system tools are often sufficient.
Troubleshooting Common Font Issues

Sometimes, new fonts don’t appear as expected. Don’t worry, these are usually fixable!
-
Font Not Appearing in Adobe Apps:
- Did you restart the app? This is the most common fix. Close Photoshop, Illustrator, or InDesign completely and reopen it.
- Is the font installed correctly on your system? Check your system’s font viewer (Font Book on Mac, Fonts folder in Control Panel on Windows) to ensure the font is listed there. If not, try reinstalling it.
- Is the font file corrupted? Download the font again from its original source. Sometimes font files can become corrupted during download or extraction.
- Font conflicts? If you have multiple versions of the same font or similar fonts, they might conflict. Font managers can help with this. Try removing duplicate or suspect fonts.
- Corrupted Adobe preferences? In rare cases, your Adobe application’s preferences might be corrupted. You can try resetting them. (Search for “reset preferences [Adobe App Name]” for instructions specific to your app).
-
Adobe Font Activation Issues:
- Check your Creative Cloud sync status: Ensure the Creative Cloud app shows fonts are synced and not stuck in a cloud icon state.
- Sign out and back into Creative Cloud: Sometimes a simple re-authentication can resolve sync issues.
- Verify your subscription: Make sure your Creative Cloud subscription is active and includes access to Adobe Fonts.
-
Font Licensing: Always double-check the license of any font you download, especially for commercial projects. Some free fonts are only for personal use. Using a font without the proper license can lead to legal issues. Reputable sites like Google Fonts and Adobe Fonts clearly state licensing terms.
-
Missing Glyphs/Characters: Some fonts, especially decorative or specialized ones, might not contain all standard characters (like international accents or special symbols). If you need these, you’ll need to find a font that supports them or use multiple fonts.
If you’re still stuck, consulting the Adobe support forums or the website where you downloaded the font can often provide specific solutions.
Best Practices for Using New Fonts
Adding fonts is exciting, but using them effectively is key to great design. Here are a few tips:
- Prioritize Readability: Even the most beautiful font is useless if your audience can’t read it. For body text


Leave a Comment