Quick Summary:
Easily simplify your UI design by integrating Font Awesome. This essential guide shows beginners how to add icons to websites and apps, enhancing user experience and visual appeal effortlessly. Learn to leverage Font Awesome for smarter, quicker design choices.
Ever feel like your user interfaces are missing that little spark? Adding visual cues can make a huge difference, but sometimes finding and implementing icons feels like a puzzle. You want your designs to be clear and engaging, but the technical side of adding icons can be a roadblock. Don’t worry! We’ll break down how Font Awesome makes this process incredibly simple, even if you’re just starting out. Get ready to give your UIs a professional polish with minimal effort.
Simplifying UI Design With Font Awesome: Your Essential Guide
Hey design explorers! Jillur Rahman here, your friendly guide from FontOrbit. Today, we’re diving into something that can seriously level up your user interface (UI) design game: Font Awesome. Think of it as your secret weapon for adding polished icons to your websites and applications without breaking a sweat. Whether you’re a seasoned designer, a blogger looking to jazz up your site, or a student just dipping your toes into the design world, this guide is for you.
We’ll cover everything from what Font Awesome is to how to use its vast library of icons to make your designs more intuitive, accessible, and visually appealing. Forget clunky image files or wrestling with different icon sets; Font Awesome offers a sleek, scalable, and super-easy way to integrate icons that look fantastic on any screen size. Let’s get started on simplifying your UI design journey!
What is Font Awesome and Why Use It for UI Design?
At its core, Font Awesome is a massive library of vector icons and social logos. What makes it special? It’s delivered as a font! This means icons are incredibly easy to scale, color, and manipulate with simple CSS, just like text. This vector-based approach ensures your icons remain crisp and clear whether they’re tiny on a mobile app or huge on a billboard, a major win for UI design where responsiveness is key.
For UI designers, marketers, and business owners, using Font Awesome offers several compelling advantages:
- Consistency: All icons share a unified style, ensuring a cohesive look across your entire interface. No more mixing and matching clashing icon styles!
- Scalability: As vector graphics, Font Awesome icons look perfect at any size. This is crucial for responsive design, where elements need to adapt to various screen dimensions.
- Ease of Use: Implementing icons is as simple as adding a specific HTML class. No need to import image files or worry about different resolutions.
- Customization: Easily change icon color, size, and even animate them using standard CSS properties.
- Performance: Using font files is generally more efficient than loading multiple image assets, which can help your website load faster.
- Accessibility: Font Awesome icons can be made accessible to screen readers, improving the experience for users with disabilities.
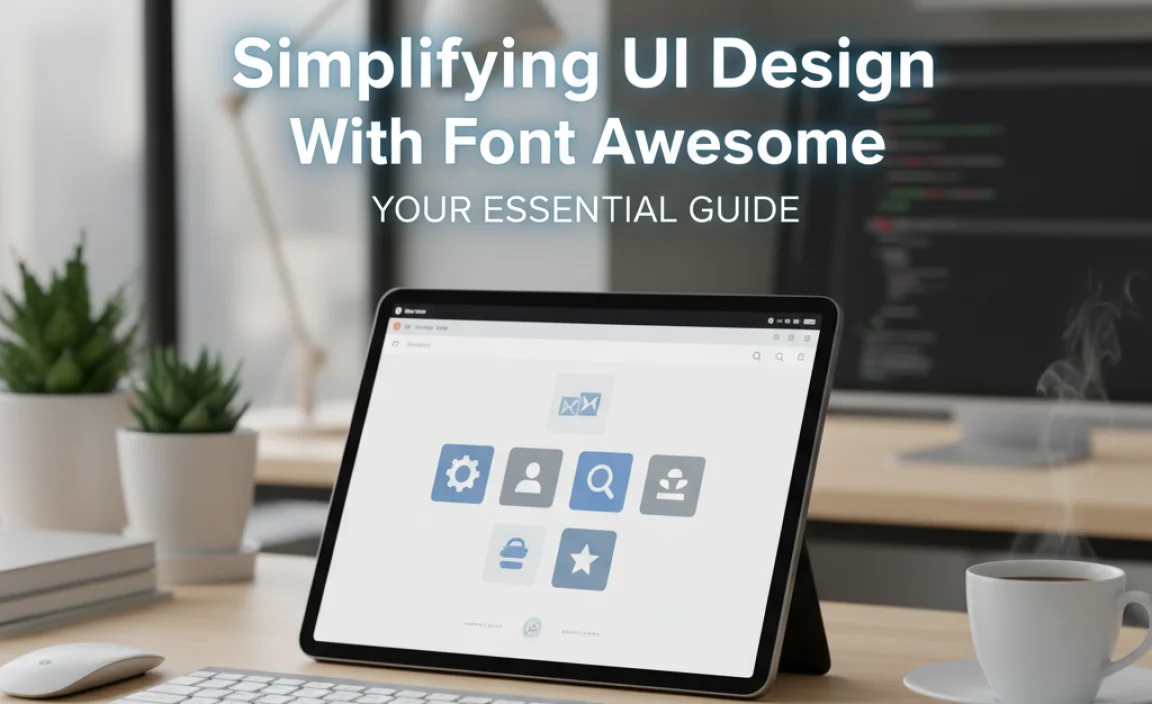
Think about it: a well-placed shopping cart icon on an e-commerce site, a gear icon for settings, or a clear set of social media links. These small visual cues significantly improve user navigation and understanding. Font Awesome provides thousands of these ready-to-use building blocks for your UIs.
Getting Started with Font Awesome
Jumping into Font Awesome is straightforward. You primarily have two main ways to use it: either by linking to their Content Delivery Network (CDN) or by hosting the files yourself. For beginners and most projects, the CDN is the easiest and fastest way to get started.
Method 1: Using the Font Awesome CDN (Recommended for Beginners)
The CDN method involves linking a single stylesheet to your HTML document. This tells your browser where to find Font Awesome’s styles and icon definitions.
-
Sign Up for a Free Account: Head over to the Font Awesome website and create a free account. This is usually required to get your unique CDN kit link.
-
Create a Kit: Once logged in, navigate to your dashboard and create a new “Kit.” A Kit is a personal collection of Font Awesome assets specifically configured for your project.
-
Copy Your Kit Code: Font Awesome will provide you with a snippet of HTML code. It will look something like this:
<script src="https://kit.fontawesome.com/your-unique-id.js" crossorigin="anonymous"></script>
Note: The `your-unique-id` will be specific to your account and kit.
- Paste into Your HTML: Place this script tag within the “ section of your HTML file. If you’re working with a CMS like WordPress, there are often theme options or plugin areas where you can add this script to be loaded across your entire site. For instance, in WordPress, you might add it via your theme’s customization options or a dedicated header/footer script plugin.
Method 2: Self-Hosting Font Awesome
If you prefer to have more control or have specific hosting requirements (like working offline), you can download and host the files yourself. This is a bit more involved but gives you direct access to the files.
-
Download Font Awesome: Go to the Font Awesome website and download the latest version. Choose the “Free” option if available and suitable for your needs.
-
Extract and Upload: Once downloaded, extract the contents of the ZIP file. You’ll find folders for CSS, JS, and webfonts. Upload these files to your project’s directory (e.g., a `fonts` or `assets` folder).
-
Link the CSS File: In your HTML’s “ section, link to the main Font Awesome CSS file. It will look something like this:
<link rel="stylesheet" href="path/to/your/folder/css/fontawesome.min.css">
Make sure the `path/to/your/folder` is correct relative to your HTML file.
-
Ensure Font Files are Accessible: The CSS file needs to reference the font files (e.g., `.woff2`, `.woff`). Ensure the `css/fontawesome.min.css` file is correctly linked and that the `webfonts` folder is in the location specified by the CSS (often the CSS expects them in a sibling `webfonts` directory).
For most users, the CDN method is quicker to set up and less prone to file path errors. Once your Font Awesome link is in place, your HTML page is ready to display icons!
Integrating Icons into Your UI
This is where the magic happens! Font Awesome makes adding icons incredibly intuitive. You’ll use specific HTML tags with classes to call upon the icons you want.
Basic Icon Usage
To display an icon, you use the `` or `` tag and add a class that specifies the icon type. Font Awesome 6 uses `fa-` prefix for regular icons, `fas-` for solid styles, `far-` for regular styles, and `fal-` for light styles.
Example: Solid Heart Icon
<i class="fa-solid fa-heart"></i>
Example: Regular Star Icon
<i class="fa-regular fa-star"></i>
Example: Brand Logo (Facebook)
<i class="fa-brands fa-facebook"></i>
You can simply copy these tags and paste them directly into your HTML where you want the icon to appear. The browser, via the linked Font Awesome stylesheet, will render them beautifully.
Icon Sizes
Need your icons bigger or smaller? Font Awesome provides easy size modifiers:
- Small: ``
- Large: ``
- 2x, 3x, 4x, 5x: `` (icons up to 5x the normal size)
- Fixed Width: `` (useful for lists where you want icons to align)
- Using Font Size: You can also control size with CSS `font-size` property.
Icon Colors
Changing icon color is as simple as applying CSS `color` property to the icon’s tag:
<i class="fa-solid fa-gear fa-spin" style="color: blue;"></i>
<i class="fa-solid fa-comment" style="color: green;"></i>
You can also use Font Awesome’s built-in color classes for common color names, such as:
- `` (often used for icons on colored backgrounds)
- For specific colors, you’d typically use inline styles or CSS classes referencing your project’s color palette.
Rotating and Flipping Icons
Add a dynamic touch by rotating or flipping icons:
- Rotate 90 degrees: ``
- Rotate 180 degrees: ``
- Rotate 270 degrees: ``
- Flip horizontally: ``
- Flip vertically: ``
Animating Icons
Want to grab attention? Font Awesome offers several simple animations:
- Spinning: ``
- Pulse: ``
- Bouncing: ``
- Fading: ``
You can customize animation speeds with CSS transitions or by applying classes like `fa-spin-pulse` (available in newer versions).
Icons in Action: Practical UI Design Examples
Let’s see how these powerful little icons can transform your UI elements.
Navigation Menus
Adding icons next to menu items makes them instantly recognizable and improves scannability.
<nav>
  <ul>
    <li><i class="fa-solid fa-house"></i> Home</li>
    <li><i class="fa-solid fa-info-circle"></i> About</li>
    <li><i class="fa-solid fa-envelope"></i> Contact</li>
  </ul>
</nav>
Buttons and Call-to-Actions (CTAs)
Icons can reinforce the action a button performs, making CTAs more persuasive.
<button class="btn-primary"><i class="fa-solid fa-download"></i> Download Now</button>
<button class="btn-secondary"><i class="fa-solid fa-play"></i> Watch Video</button>
Form Elements
Use icons to indicate input types, validation status, or password visibility.
<div class="form-group">
  <label for="email">Email</label>
  <input type="email" id="email" placeholder="[email protected]">
  <i class="fa-solid fa-envelope form-icon"></i>
</div>
<div class="form-group">
  <label for="password">Password</label>
  <input type="password" id="password" placeholder="">
  <i class="fa-solid fa-eye-slash form-icon" id="togglePassword"></i>
</div>
Social Media Links
Displaying brand logos is a common and effective use case.
<ul class="social-links">
  <li><a href="#"><i class="fa-brands fa-twitter"></i></a></li>
  <li><a href="#"><i class="fa-brands fa-instagram"></i></a></li>
  <li><a href="#"><i class="fa-brands fa-linkedin-in"></i></a></li>
</ul>
Loading Indicators
A spinning or pulsing icon can gracefully indicate that content is loading.
<div class="loading-spinner">
  <i class="fa-solid fa-cog fa-spin fa-3x"></i>
</div>
Font Awesome Pro vs. Free: What’s the Difference?
Font Awesome offers both a robust Free version and a more extensive Pro version. Understanding the differences can help you choose the right option for your project.
| Feature | Font Awesome Free | Font Awesome Pro |
|---|---|---|
| Number of Icons | Over 1,700+ icons | Over 2,500+ icons (including solid, regular, light, thin, duotone, and brands) |
| Styles | Basic styles (e.g., regular, light) | All styles, including more nuanced and visually distinct options like Duotone. |
| Brands | A selection of popular brands | An expanded and up-to-date catalog of brand icons. |
| Commercial Use | Free for commercial use (check license for details) | Commercial use included with subscription. |
| Support | Community support via forums, documentation. | Priority support, direct access to their team. |
| Cost | Free | Paid subscription (various tiers) |
| Advanced Features | Basic animation, size, color customization. | Advanced animations, subsetting, SVG icons support, and more. |
For many common UI tasks, the Free version of Font Awesome is more than sufficient. However, if you need access to a wider variety of styles, unique icon looks (like duotone), or the latest brand logos, a Pro subscription is a worthwhile investment. You can explore their full icon list on the Font Awesome icons page.
Accessibility Considerations with Font Awesome
Designing for everyone is paramount. Font Awesome can be made fully accessible to users relying on screen readers.
The Problem: By default, screen readers might announce an icon simply as “graphic” or ignore it entirely, leaving users without crucial visual information.
The Solution: Use ARIA attributes to provide context. The most common method is `aria-hidden=”true


Leave a Comment