Windows 10 Font Folder Demystified: Essential Guide
Unlock the secrets of your Windows 10 font folder! This guide will show you exactly where to find it, what’s inside, and how to manage your fonts like a pro. From installing new typefaces to troubleshooting common issues, you’ll gain control over your system’s typography with simple, step-by-step instructions. Let’s dive in and make your fonts work for you!
Hello creative friends! Jillur Rahman here from FontOrbit. Ever felt a little lost when it comes to fonts on your computer? You know, those little digital letters that bring your designs, documents, and even social media posts to life? If you’ve ever wondered where Windows 10 keeps all those amazing typefaces, or how to add new ones to your collection, you’re in the right place. Many creative folks, from graphic designers crafting logos to bloggers choosing the perfect heading font, sometimes find themselves scratching their heads about the “font folder.” It’s a common little mystery! But don’t worry, it’s much simpler than it seems. I’m here to demystify the Windows 10 font folder, giving you a friendly, step-by-step walkthrough. We’ll explore what it’s for, how to find it, and how to manage your font treasures like a seasoned designer. Ready to take control of your creative toolkit? Let’s get started!
What is the Windows 10 Font Folder?
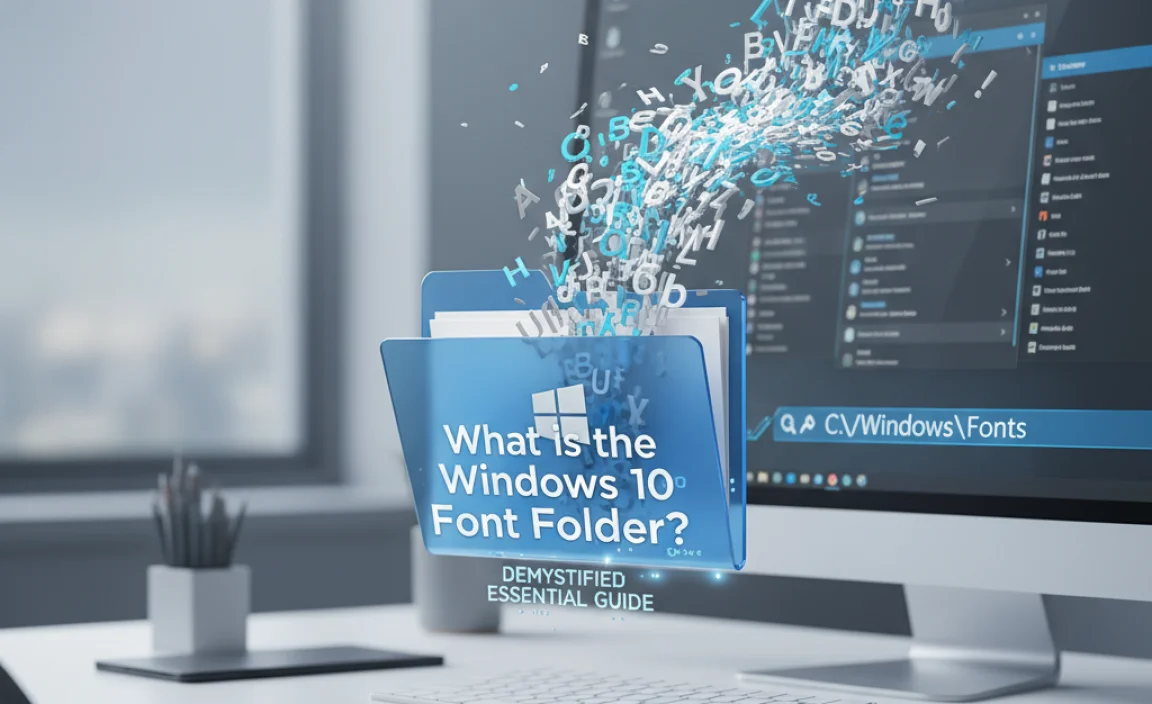
The Windows 10 font folder is a special location on your computer where all installed system fonts are stored. Think of it as the central library for every typeface your operating system can access. When you open a program like Microsoft Word, Adobe Photoshop, or even your web browser, it pulls from this library to display text. Managing fonts here is crucial for ensuring consistency in your designs and documents, and for accessing the widest range of creative options.
Why is this folder so important for creatives? Well, the fonts available to you directly impact the look and feel of your work. A bold, industrial font for a brand logo is very different from a delicate, script font for a wedding invitation. Having easy access and control over your font library means you have more creative freedom and can make smarter design choices. This section will cover the basics of what this folder holds and its significance.
Locating the Windows 10 Font Folder
Finding your font folder is the first step to mastering font management. Luckily, Windows 10 makes it pretty straightforward. There are a few ways to get there, and knowing them all can be helpful.
Method 1: Using the Control Panel
The classic way to access your fonts has always been through the Control Panel. This remains true for Windows 10.
- Open the Control Panel: Click your Start button and type “Control Panel.” Select it from the search results.
- Navigate to Fonts: In the Control Panel, look for “Appearance and Personalization.” Click on it. Within that section, you’ll see an option for “Fonts.” Click on “Fonts.”
- Access the Font Folder: This will open a new window displaying all the fonts currently installed on your system. This window is essentially a view of your font folder.
Method 2: Direct Folder Access
You can also navigate directly to the font folder using File Explorer. This is often the quickest way once you know the path.
- Open File Explorer: Click the yellow folder icon on your taskbar or press the Windows key + E.
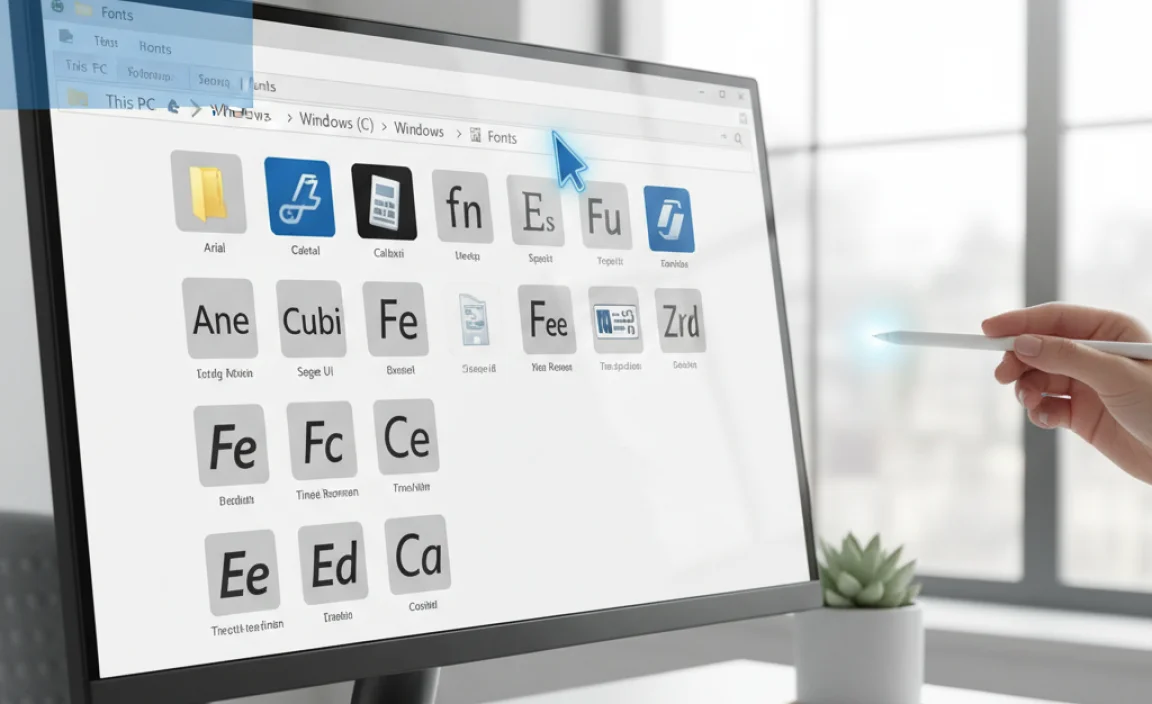
- Navigate to the System Drive: In File Explorer, click on “This PC” in the left-hand pane. Then, double-click on your local disk, which is usually labeled as C:.
- Open Windows Folder: Double-click on the “Windows” folder.
- Open the Fonts Folder: Inside the “Windows” folder, find and double-click on the “Fonts” folder.
You’ve now successfully located the Windows 10 font folder! It should contain a lot of icons representing different font styles. Each icon represents a font file that your system uses.
Understanding the Font Folder Contents
Inside this folder, you’ll find files with extensions like .ttf (TrueType Font), .otf (OpenType Font), and sometimes .fon (Font). These are the actual font files. Windows uses these files to render text in applications. You’ll notice many familiar fonts like Arial, Times New Roman, and Calibri are already here. Some are system essentials, while others might have been added by software you’ve installed.
Installing a New Font in Windows 10
One of the most common reasons people look for the font folder is to install new fonts. Adding new typefaces can dramatically change the look of your projects and give you a fresh creative edge. Here’s how to do it:
Step 1: Acquire Your Font Files
First, you’ll need font files. You can get these from various sources:
- Free Font Websites: Many sites offer free fonts for personal or commercial use. Always check the licensing terms! Popular options include Google Fonts, Font Squirrel, and DaFont.
- Paid Font Foundries: For professional and unique typefaces, consider purchasing from foundries like Adobe Fonts, MyFonts, or Font Fabric.
- Bundles and Subscriptions: Services like Adobe Creative Cloud include access to a vast library of Adobe Fonts.
Make sure you download fonts from reputable sources to avoid malware. Once downloaded, the font files (usually .ttf or .otf) might be in a zipped folder. You’ll need to extract them first.
Step 2: Install the Font
There are a couple of easy methods to install your new font:
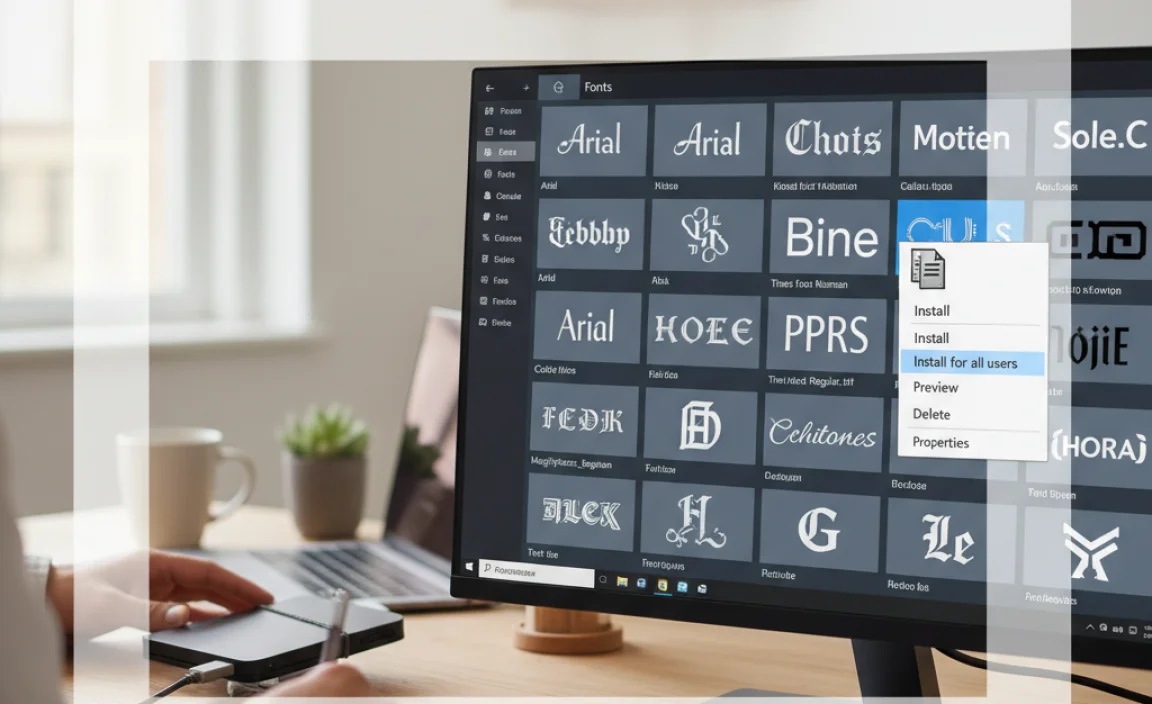
Method A: Right-Click Install (Recommended for Beginners)
This is the simplest and most user-friendly method.
- Locate the Font File: Find the extracted font file (.ttf or .otf) on your computer.
- Right-Click the File: Right-click on the font file.
- Select “Install”: In the context menu that appears, choose “Install.” If prompted by User Account Control, click “Yes.”
Windows will automatically copy the font file to the correct system folder and make it available to all applications.
Method B: Drag and Drop into the Fonts Folder
If you prefer to work directly with the folder, this method is for you.
- Open the Fonts Folder: Navigate to the Windows 10 font folder using one of the methods described earlier (e.g., Control Panel > Appearance and Personalization > Fonts or
C:WindowsFonts). - Open Font File Location: Open another File Explorer window and navigate to where you saved your downloaded font files.
- Drag and Drop: Select the font file(s) you want to install and drag them directly into the open “Fonts” folder window.
You’ll see a progress window as Windows installs the font.
After installation, the new font should appear in the font list of most applications. You might need to restart some programs for the new font to appear. For example, if Photoshop isn’t showing the new font, close and reopen it.
Managing Your Fonts

Once you start collecting fonts, you’ll want to keep them organized. Windows 10 offers some basic management features directly within the Fonts folder.
Viewing Installed Fonts
As shown before, the Fonts folder (accessible via Control Panel or directly at C:WindowsFonts) lists all your installed fonts. You can:
- See Font Previews: Double-clicking on a font file will open a window showing its characters and styles.
- Check Font Details: The font preview window also shows font properties like file name, version, and typographical details.
- Manage Font Sizes: In the Fonts folder view, under “View” in the File Explorer ribbon, you can choose how to display your fonts: Extra large icons, Large icons, Medium icons, Small icons, List, Details, etc. This helps in quickly identifying fonts.
Uninstalling Fonts
If you no longer need a font or want to free up system resources, you can uninstall it.
- Open the Fonts Folder: Navigate to
C:WindowsFonts. - Select the Font: Click on the font you wish to remove to select it.
- Click “Delete”: In the File Explorer ribbon, click the “Delete” button. Alternatively, you can right-click the font and select “Delete.”
- Confirm Deletion: You’ll be asked to confirm. Click “Yes” to proceed.
Important Note: Do not uninstall system fonts that came pre-installed with Windows. Removing essential fonts can cause system instability or program errors. Only uninstall fonts that you have downloaded or installed yourself.
Font Preview and Printing
The Fonts folder allows you to preview fonts before using them in your applications.
- Preview: Double-clicking a font file opens a preview window. This is useful for seeing how a font looks and if it has different weights (like bold, italic, light).
- Print: In the preview window, there’s a “Print” button. This lets you print a sample of the font, which can be helpful for designers keeping physical font libraries or for quickly comparing styles.
Advanced Font Management Techniques
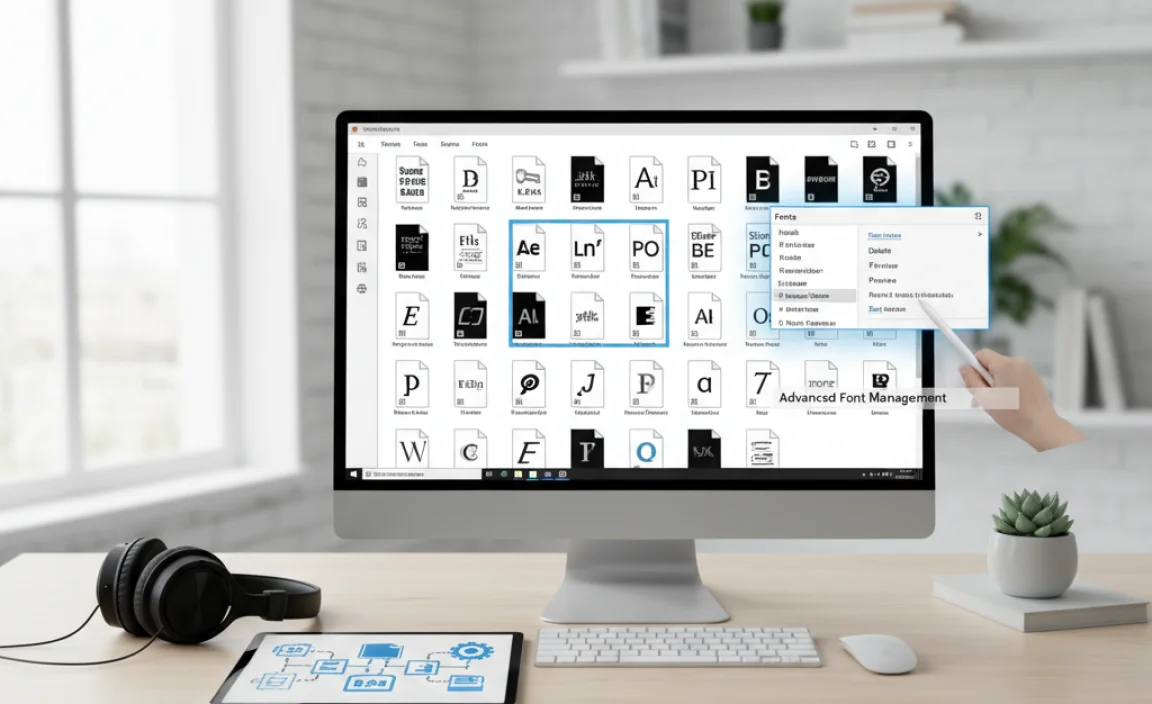
For designers who deal with a large number of fonts, the built-in Windows system can become cumbersome. Here are some more advanced strategies and tools.
Using Font Management Software
Dedicated font managers offer features far beyond what Windows provides. These tools allow you to:
- Activate/Deactivate Fonts: Quickly turn fonts on and off without needing to install or uninstall them. This is a huge time-saver for large font libraries.
- Organize Fonts into Collections: Group fonts by project, style, or client for easy access.
- Preview Fonts More Intelligently: Advanced preview options, character maps, and comparison tools.
- Manage Font Conflicts: Identify and resolve issues with duplicate or conflicting font files.
Some popular font management software options include:
| Software Name | Platform | Key Features | Pricing |
|---|---|---|---|
| FontBase | Windows, macOS, Linux | Free for personal use, cloud sync, organized collections, quick activation. OpenType.js integration for advanced font analysis. | Free (Personal), Subscription (Pro) |
| Suitcase Fusion (by Extensis) | Windows, macOS | Professional-grade features, auto-activation plugins for Adobe apps, extensive organization, font previews. | Subscription-based |
| NexusFont | Windows | Free, lightweight, easy to use, font previews, activation/deactivation. | Free |
| RightFont | macOS | Sleek interface, Adobe CC integration, font previews, cloud sync. | Subscription-based |
Exploring these tools can significantly streamline your workflow if you find yourself constantly installing and uninstalling fonts or struggling to find the right one among hundreds.
Understanding Font Formats
While exploring fonts, you’ll encounter different file formats. The two most common in modern usage are:
- OpenType (.otf): A more modern, versatile format developed jointly by Adobe and Microsoft. OpenType fonts can contain more characters, ligatures, and advanced typographic features. They are generally preferred for their flexibility and broader character support. You can find more details on OpenType features at the Microsoft Typography documentation.
- TrueType (.ttf): An older but still widely used format. TrueType fonts are well-supported across different operating systems and applications. Many fonts are available in this format.
Windows 10 can handle both .otf and .ttf files seamlessly, so you don’t need to worry too much about compatibility when installing. Many fonts also come with different weights and styles like Regular, Bold, Italic, Light, Condensed, etc., all within the same font family.
Accessing Fonts through Adobe Creative Cloud
If you’re a subscriber to Adobe Creative Cloud, you have access to a massive library of fonts through Adobe Fonts (formerly Typekit). These are not installed directly into the Windows font folder in the traditional sense but are activated and managed through the Creative Cloud desktop app. Once activated, they become available within Adobe applications and often in other Windows programs as well. This is a powerful way to access a vast collection of high-quality fonts without manually downloading and installing each one.
Troubleshooting Common Font Issues
Occasionally, you might run into problems with fonts. Here are some common issues and how to resolve them.
Font Not Appearing in Applications
Problem: You’ve installed a font, but it doesn’t show up in the font list of your program (e.g., Word, Photoshop).
Solution:
- Restart the Application: Most programs load their font lists on startup. Close and re-open the application.
- Restart Your Computer: Sometimes, a full system restart is needed for Windows to fully register the new font.
- Check for Duplicates: Ensure you haven’t installed two versions of the same font that might be causing a conflict.
- Verify Installation: Double-check that the font file was installed correctly by looking for it in the
C:WindowsFontsfolder.
Corrupted Font Files
Problem: A font is causing errors, displays incorrectly, or won’t install.
Solution:
- Re-download the Font: The font file might have been corrupted during download. Try downloading it again from the source.
- Use a Different Format: If available, try installing the .otf version if you downloaded .ttf, or vice-versa.
- Run Font Troubleshooter: Windows has a built-in troubleshooter. Go to Settings > Update & Security > Troubleshoot > Additional troubleshooters, and look for font-related issues or general printing troubleshooters. While this link focuses on printers, font issues can sometimes be related to system services that also affect printing.
- Check for Updates: Ensure your Windows 10 is up to date.
Font Display Issues (Weird Characters)
Problem: A font displays with strange symbols instead of the intended letters.
Solution:
- Check Font Encoding: This usually happens with older font formats or improperly prepared fonts. Ensure the font supports the language or character set you are trying to use. OpenType fonts generally have better support for a wide range of characters.
- Reinstall the Font: A clean reinstallation might resolve the issue.
- Avoid System Fonts: Stick to reputable sources and avoid installing very obscure or experimental fonts if you rely on them crucially.
| Common Issue | Likely Cause | Quick Fixes |
|---|---|---|
| Font not showing up | App didn’t refresh, system glitch | Restart app, restart PC, check installation path. |
| Font installer errors | Corrupted file, missing system component | Re-download font, try a different format (.ttf/.otf), check Windows updates. |
| Garbled characters / Wrong symbols | Encoding issues, font incompatibility, damaged font file | Use reputable fonts, check character set support, reinstall font. |
| System runs slow after font install | Too many active fonts, resource-heavy fonts | Uninstall unused fonts, use font management software to deactivate. |
Remember, most font issues are minor and can be fixed with patience and by following these steps. For serious problems or if you suspect a deeper system issue, consider seeking help from Microsoft support or design forums.
Best Practices for Font Management
To keep
.lwrp.link-whisper-related-posts{
margin-top: 40px;
margin-bottom: 30px;
}
.lwrp .lwrp-title{
}.lwrp .lwrp-description{
}
.lwrp .lwrp-list-container{
}
.lwrp .lwrp-list-multi-container{
display: flex;
}
.lwrp .lwrp-list-double{
width: 48%;
}
.lwrp .lwrp-list-triple{
width: 32%;
}
.lwrp .lwrp-list-row-container{
display: flex;
justify-content: space-between;
}
.lwrp .lwrp-list-row-container .lwrp-list-item{
width: calc(25% – 20px);
}
.lwrp .lwrp-list-item:not(.lwrp-no-posts-message-item){
max-width: 150px;
}
.lwrp .lwrp-list-item img{
max-width: 100%;
height: auto;
object-fit: cover;
aspect-ratio: 1 / 1;
}
.lwrp .lwrp-list-item.lwrp-empty-list-item{
background: initial !important;
}
.lwrp .lwrp-list-item .lwrp-list-link .lwrp-list-link-title-text,
.lwrp .lwrp-list-item .lwrp-list-no-posts-message{
}@media screen and (max-width: 480px) {
.lwrp.link-whisper-related-posts{
}
.lwrp .lwrp-title{
}.lwrp .lwrp-description{
}
.lwrp .lwrp-list-multi-container{
flex-direction: column;
}
.lwrp .lwrp-list-multi-container ul.lwrp-list{
margin-top: 0px;
margin-bottom: 0px;
padding-top: 0px;
padding-bottom: 0px;
}
.lwrp .lwrp-list-double,
.lwrp .lwrp-list-triple{
width: 100%;
}
.lwrp .lwrp-list-row-container{
justify-content: initial;
flex-direction: column;
}
.lwrp .lwrp-list-row-container .lwrp-list-item{
width: 100%;
}
.lwrp .lwrp-list-item:not(.lwrp-no-posts-message-item){
max-width: initial;
}
.lwrp .lwrp-list-item .lwrp-list-link .lwrp-list-link-title-text,
.lwrp .lwrp-list-item .lwrp-list-no-posts-message{
};
}


Leave a Comment